
Table of Contents
We are three weeks away from leaving the homestead we’ve spent a decade building.
Ten years ago, Dan and I moved onto 160 acres in the central interior of BC with a lot of enthusiasm and not nearly enough knowledge. We’ve grown most of our own food, raised livestock, built a root cellar, planted a forest garden, and stocked a pantry that could carry us through hard winters. We’ve also made a lot of mistakes.
This week I walked the ranch one more time and made a list: things we got right, things we’d do differently, and what we’re bringing with us to the new 16-acre farm. Here’s the honest version.
Root Cellar: Build It Right From the Start
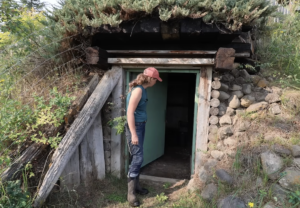
Our root cellar was built in the 1930s with some 1980s upgrades. It works, and I’ve learned a great deal from using it, but it’s also taught me what not to do.
What we learned:
- Ventilation matters more than you think. Our cellar has two simple pipes for airflow, which isn’t quite enough. The result is moisture buildup over winter that requires leaving the door open every summer to dry out. A proper cellar needs venting both low and high so air circulates naturally.
- Concrete walls keep rodents out better than wood. Our current cellar has wooden supports that make it easy for mice to find their way in. There is nothing more discouraging than discovering nibbled carrots in January.
- Shelving is worth the effort. We’ve been using pallets on the floor, which wastes enormous amounts of vertical space. Proper shelving with pull-out bins would let us fit significantly more and keep things far better organized.
- High humidity is good, standing water is not. A root cellar wants around 95% humidity for carrots, potatoes, beets, and turnips, but you don’t want condensation dripping from the walls or water pooling on the floor.
What we’re building next: A fully concrete root cellar with a 15-foot entrance tunnel (this design works well and keeps the main cellar temperature stable), proper cross-ventilation, shelving along the walls, and every rodent entry point sealed from the beginning.
Fencing First. Livestock Second.
This is the single biggest thing Dan and I wish we had done differently. We brought animals onto this property before we had proper fencing infrastructure in place, and it cost us enormous amounts of time, money, and stress over the years.
Good fencing is not optional. It is not something you do after the animals arrive. It is the first project, before anything else.
At the new property, we are not bringing chickens until there is a proper coop. We are not expanding livestock until the right pens are in place. The new farm actually has wonderful fencing for sheep and small livestock already, which is part of why we chose it. Our sheep and dairy cow are coming with us. The chickens are not, yet.
Tip: Before you bring any animal onto a property, walk every inch of the relevant fencing and ask yourself honestly whether it would hold. If the answer is “mostly,” you are not ready.
Forest Garden and Orchard: Plan for Water and Use the Mid-Story Space
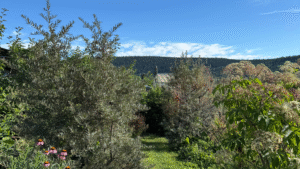
I built our forest garden about seven or eight years ago, and it now produces hundreds of pounds of food each year. But I’d do several things differently if I were starting it again.
- Match plants to where the water actually goes. I had elderberries planted at the top of a slope where they dried out constantly, and eventually had to move them to the bottom. Moisture-loving plants need the lowest, wettest spots. Drought-tolerant plants like seabuckthorn belong up top.
- Plant more berry bushes in the mid-story. I’d add far more gooseberries and other soft fruits between the fruit trees. (Turns out I love gooseberries. I hadn’t grown them before.)
- Plant comfrey under every fruit tree. This has been one of the best things I’ve done in the orchard. Comfrey suppresses grasses naturally, feeds the bumblebees, and keeps competition away from the shallow roots of fruit trees. I’ve been propagating roots to bring with me.
- Buy older trees if your budget allows. Starting from young saplings means waiting five to six years for a significant crop. At the new property I’m planning to buy four or five year old trees to get producing sooner.
No-Till Gardening: We Are Never Going Back
This is our third or fourth year without tilling, and every year the garden improves. Fewer weeds, healthier plants, more visible life in the soil.
My son pointed out during a weeding session this week that the years we struggled most with weeds were the years we went back to tilling. Once you stop disturbing the soil, the weed seed bank settles down, the microbial community establishes itself, and the whole system starts working for you instead of against you.
We’re also bringing soil with us when we move, a scoop or two of our garden beds to inoculate the new ground with the biology we’ve spent years building up.
Greenhouses and Season Extension: One Good Structure Instead of Three Separate Ones
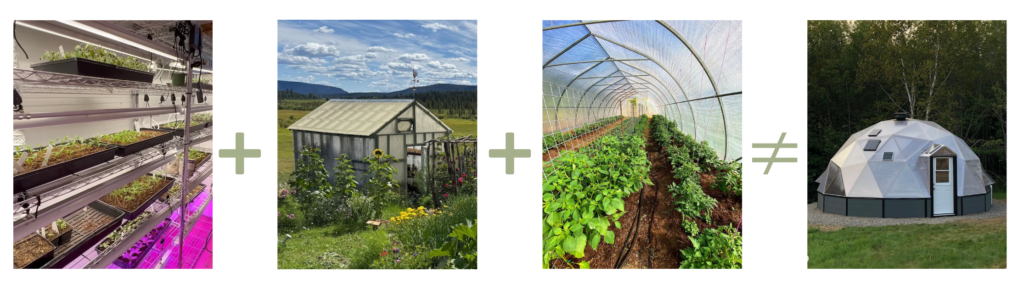
For years, my growing process involved three separate spaces:
- An indoor growroom for starting seeds in January and February
- An outdoor nursery greenhouse for hardening off seedlings
- A high tunnel for larger-scale growing through the season
That is a lot of physical steps, a lot of infrastructure to maintain, and a lot of expense. At the new property, we are building a single four-season greenhouse to do all of that work. One space for seed starting in winter, hardening off in spring, and growing through the season, with the added benefit of giving me somewhere warm and green to be during the dark months, which I am genuinely looking forward to.
The goal is to have it built and operational by mid-October.
Pantry Design: What Worked and What We’re Changing
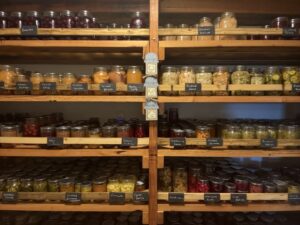
We built our current canning pantry from scratch, and we’re proud of it. But we’ve learned enough to do it even better next time.
What worked:
- Thick, industrial shelving that doesn’t bow under the weight of hundreds of filled jars
- Excellent insulation keeps the pantry cool even though it sits beside the wood stove
- A ceiling vent that opens in winter to lower the temperature further
- Lip boards on the front of each shelf so jars don’t rattle off
What we’re improving:
- Adding lighting along the back of each shelf so you can see all the way to the rear
- Finding a better labelling solution (our Velcro labels pull off and don’t move easily when we reorganise mid-winter; we’re still working on the ideal fix)
- Adding shelving along both walls if the new room allows it
If you have a labelling solution that works well for canning pantry shelves, especially one that’s easy to move around, I’d genuinely love to hear it.
Infrastructure Before Projects
More broadly: finish what you start before moving on. Dan and I are enthusiastic and ambitious, and over the years we’ve left more than a few projects at the “good enough” stage because something new and exciting came along. At the new farm, we’re committing to taking things one at a time and seeing each project all the way through before starting the next one.
Hold me to it.
Build for the Life You’ll Have, Not Just the Life You Have Now
We built this homestead for the family and the lifestyle we had at the beginning. What we needed ten years in looked different, and what we’ll need in another decade is different still. The decisions we’re making about the new property, including the smaller acreage and closer proximity to services, reflect where our family actually is now and where we think we’re headed.
Bring Your Soil Biology With You
The soil here has taken years to build. Years of compost, no-till, and intentional care have created a microbial community that is genuinely thriving. When we move, we’re taking scoops of this garden soil to inoculate the new beds.
If you’ve built your soil over many years, it’s worth doing the same when you move on. The biology is harder to replace than the plants.
It’s Okay for Your Dream to Change
This one isn’t about fencing or root cellars. But it might be the most important lesson of the last 10 years.
A place can be exactly right for one chapter of your life and no longer serve you in the next. That doesn’t mean you failed. It means you grew. Leaving this ranch isn’t giving something up. It’s choosing what comes next with the clarity that only experience can give you.
This applies whether you’re thinking about a homestead, a career, a relationship, or anything else you’ve built with your whole heart. Switching gears, even when people around you think you’re crazy, is sometimes the wisest and most practical thing you can do.
Printable Checklist: 10 Homestead Lessons to Plan Your Next Setup
Use this checklist to audit your current homestead infrastructure or plan your next property setup before diving into new projects:
Root Cellar Fundamentals
Built with concrete walls to block rodent entry
Dual high and low ventilation installed for continuous airflow
Vertical wall shelving with pull-out bins planned instead of floor pallets
High humidity maintained (~95%) without standing water or dripping walls
Fencing & Livestock Readiness
Every foot of fence walked, tested, and secured before any animals arrive
Dedicated pens, coops, and shelters completely built before bringing livestock on-site
Orchard & Forest Garden Layout
Water pathways mapped: moisture-loving plants placed in lowest spots; drought-hardy plants up top
Mid-story layered with soft fruit bushes (gooseberries, currants, berries) between canopy trees
Comfrey planted under every fruit tree base for grass suppression, mulch, and pollinator forage
4–5 year-old fruit trees sourced if producing fruit sooner is a priority
Soil Biology Management
No-till beds established to protect mycorrhizal networks and reduce weed pressure
Handfuls of rich, mature garden soil saved/transported to inoculate brand-new beds with active biology
Season Extension Consolidation
Growing setups streamlined into a single, multi-use 4-season greenhouse rather than split across separate rooms and tunnels
Canning Pantry Construction
Heavy-duty, reinforced shelving built to support substantial jar weight without bowing
Lip boards secured to shelf fronts to prevent jars from vibrating or sliding off
Low ambient temperatures maintained through insulation and winter ventilation
Integrated shelf lighting planned to view rows of jars all the way to the back
Project Management Discipline
Current high-priority infrastructure project 100% completed before breaking ground on the next exciting idea
Future-Proof Planning
Infrastructure, acreage size, and layout matched to where your family is heading in the next 5–10 years, not just where you are today
After 10 years of learning the hard way, I am genuinely excited to build something new.
If you want to follow along as we set up the new farm from scratch, including the root cellar build, the four-season greenhouse, all the garden planning, and everything in between, join us in the LMR Community. It’s a warm and practical group of people who love this kind of life. We’d love to have you.