
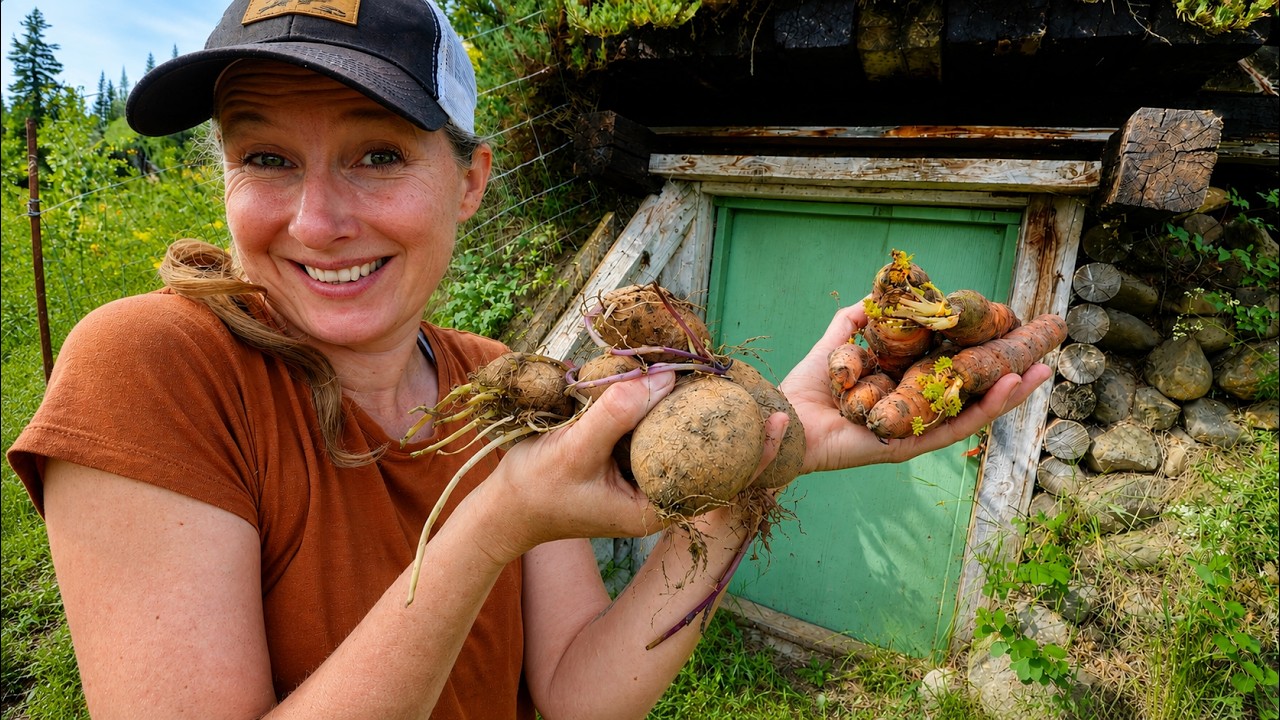


Chelsea standing in front of her root cellar door holding 10 month old potatoes and carrots with a smile on her face.

How To Use Up Old Root Cellar Vegetables: Old-fashioned Beef Stew

Table of Contents

Managing a food supply requires careful planning. You must know how to stretch your storage assets effectively. This practice keeps the kitchen running until the new season’s harvest arrives. It is deeply satisfying to clear out the bottom bins of your root cellar. Turning past-prime staples into a comforting dinner reduces household waste.

In this guide, we will cover the process for inspecting potatoes, carrots, and turnips. These crops have been stored for many months. You will learn how to use a high-heat pan sear. A long overnight simmer easily breaks down dense, old vegetable fibers. This simple method creates a traditional old-fashioned beef stew with a thick gravy base.

You can work alongside me by clicking the video below.

Evaluating and Prepping Extended-Storage Roots

When root vegetables have been sitting in cold storage for nearly a year, their appearance can be off-putting. However, if they have maintained their structural stiffness, they remain perfectly suited for long, slow-cooking methods.

Inspecting Extended-Storage Carrots

By late winter, cellared carrots often develop fine hair growth out the sides. They also lose some of their natural, crisp sweetness. As long as the core of the root remains solid and firm, they are entirely edible. Give them a firm scrub with a stiff brush and a thorough peel. The long cooking time in a well-seasoned broth easily compensates for any loss of direct sugars.

A carrot that has been stored in the root cellar for 9-10 months.
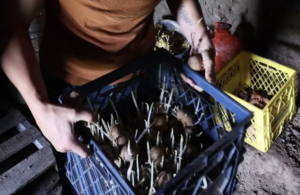
A blue milk crate full of spouting potatoes in the root cellar.

Managing Sprouting Potatoes

Potatoes held for an extended period will naturally begin to throw out roots and sprouts. Squeeze the potato firmly to check the density. If it feels relatively firm rather than soft or spongy, keep it. Manually snap the sprouts off completely during washing. Peel away green skin patches and cube them as normal.

The Secret to a Rich Gravy Base: Using Canned Provisions

Many modern beef stews rely on a heavy tomato foundation. This traditional recipe uses home-canned French onion soup instead.

Pre-simmered onion soup adds immediate depth and caramelization notes. It builds excellent structural body in your gravy. You do not need to stand over raw onions for hours on the stove. This system rotates your pantry inventory efficiently. It clears out older jars before the autumn canning cycle begins.

Stew ingredients in a large roasting oven to be cooked for 24 hours.

Beef Stew

Built on a dark, savory gravy base of home-canned French onion soup instead of a standard tomato foundation, this method relies on a high-heat pan sear and a long, 24-hour simmer. It is an excellent kitchen system for completely breaking down the dense structural fibers of older potatoes, carrots, and turnips until they are perfectly tender.
Course Main Course
Cuisine American

Ingredients
  

  • 2 to 3 pounds stew beef (thawed) The Beef Base
  • 4 cups firm potatoes sprouts removed (cubed) The Cellar Roots
  • 2 cups carrots (scrubbed, peeled, and sliced) The Cellar Roots
  • 3 or 4 young turnips (scrubbed and chopped whole; no need to peel small ones) Fresh Addition
  • 3 large stalks of fresh celery (sliced) Fresh Addition
  • 4 quarts home-canned French onion soup The Broth Base
  • 2 quarts water The Broth Base
  • A small handful each of fresh basil thyme, winter savory, parsley, and oregano. thyme, winter savory, parsley, and oregano.
  • salt and black pepper to taste.

Instructions
 

  • Sear the Meat: Heat a heavy skillet on your stove until it is dry and hot. The pan must be hot enough to immediately sear the outside of the stew beef, locking in the juices and browning the surface rather than letting the meat steam in its own liquid. Add the beef, season with salt and pepper, and brown all sides thoroughly.
  • Deglaze the Skillet: Transfer the seared meat directly into your deep roaster oven or large stockpot. Pour a splash of water into the hot skillet, using a sturdy spoon to scrape up all the dark, cooked-on meat bits stuck to the bottom of the pan. Pour this rich deglazing liquid straight over the meat in the roaster to guarantee a deep color and savory foundation.
  • Incorporate the Soup and Roots: Pour the 4 quarts of French onion soup and 2 quarts of water over the beef. Add your prepped potatoes, carrots, and turnips into the liquid.
  • Chop and Add the Herbs: Take your fresh basil, thyme, winter savory, parsley, and oregano, give them a quick rinse, and chop them finely straight into the pot.
  • Add Celery: Wash, slice, and add your celery stalks to the mixture to round out the traditional aromatics.
  • The Slow Simmer: Set your roaster to low and allow the stew to slow-cook steadily overnight, targeting a full 24 hours of total cook time. This extended window completely breaks down the fibers of both the older storage roots and the stew meat, resulting in a tender finish and a thick, savory gravy.

Notes

This recipe is based off of the Beef Stew recipe on page 68 of the Little Mountain Ranch Family Cookbook 2nd Edition.
Keyword beef stew, old vegetables, rich gravy, root cellar vegetables, root vegetables
Tried this recipe?Let us know how it was!

Homestead Utility: Clearing and Airing Storage Spaces

When you reach the bottom of your vegetable bins, empty the space completely. Clear out spent or softened pieces. Sweep down the shelves thoroughly. Open up the vents or doors to let the room air out.

Drying the storage room during warm weeks prevents moisture build-up. It prepares your infrastructure for the upcoming autumn harvest.

Printable Checklist

  • Inspect Carrots for Firmness: Check long-stored carrots to ensure they are still structurally solid. Trim away any fine white root growth, then scrub and peel the outer skin completely before slicing.
  • Remove Sprouts from Potatoes: Examine winter potatoes by squeezing them firmly. If they are stable and dense, manually snap off all green sprouts and root growth at the sink.
  • Utilize Small Turnips Whole: When harvesting or using tiny, young turnips, skip the peeling step entirely. Simply scrub the outer skin clean and chop them straight into the pot.
  • Execute a High-Heat Meat Sear: Bring your skillet to a dry, hot temperature before adding the stew beef. Brown the edges thoroughly to build a solid flavor profile and prevent the meat from steaming.
  • Deglaze the Cooking Skillet: Always pour a splash of water into your hot pan after browning meat. Scrape loose the browned bits and add this dark liquid directly to the roaster base.
  • Incorporate Pre-Simmered Broth: Use canned provisions like French onion soup to establish an instant, rich gravy foundation without spending hours sweating down raw onions.
  • Commit to a 24-Hour Simmer: Set your cooking equipment to low and allow the stew to simmer overnight. This long window is necessary to completely tenderize the dense fibers of extended-storage roots.
  • Air Out Storage Spaces Seasonal: Once your vegetable bins are completely empty, clear out spent debris and leave the cellar doors or vents open to dry out the infrastructure before the autumn harvest.

Learning how to utilize every bit of food you have worked to store is the backbone of a self-sufficient home. If you want to learn more about growing vegetables and root cellaring, join us. This is exactly what we discuss and troubleshoot inside our community.

We talk about real-world systems that actually work for ordinary households. If you want to learn alongside capable people, please click here for all the details or to join the Little Mountain Ranch Community.

Leave a Comment

Recipe Rating